- Hardware Manuals
- Commissioning and Tuning Guide
- Software Reference
- Resources
Important
This section is only required if you are not using OBLAC Drives Box
OBLAC Drives Virtual Machine is run on a virtualization software. VMware Player version 14 or above for Windows and Linux or VMware Fusion 10 for macOS are needed for running OBLAC Drives Virtual Machine.
Note
OBLAC Drives is an application that runs in a Web Browser. We recommend the latest version of Google Chrome.
Download the OBLAC Drives Virtual Machine image
If you have trouble downloading from Amazon webservice, please try our Baidu server:
Install and open VMware Workstation Player
Note
ANY version of VMWare Workstation Player starting from 14.0 can be used for OBLAC Drives.
Open a virtual machine
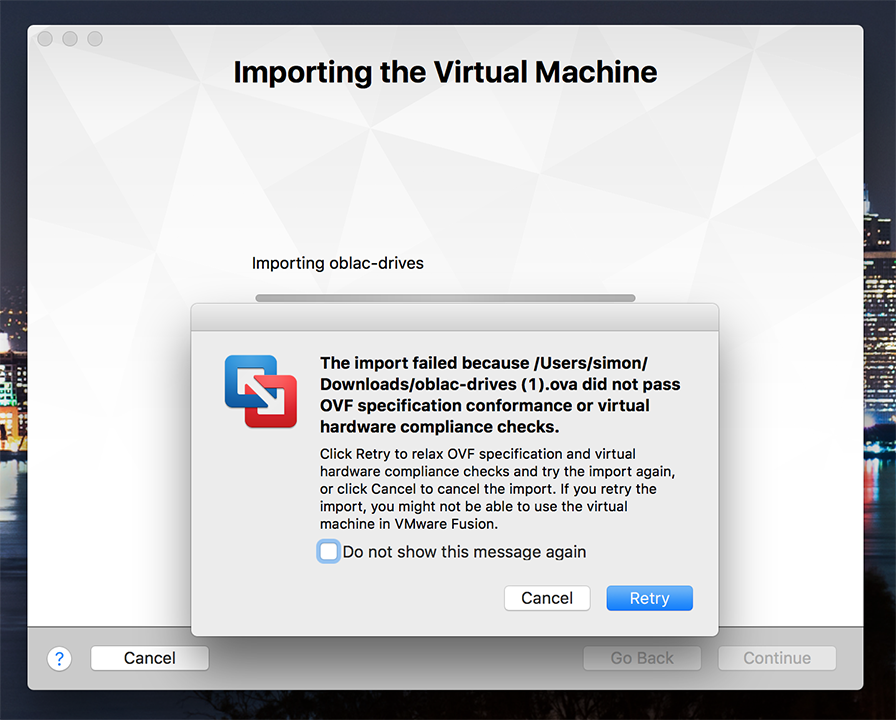
Select the downloaded OBLAC Drives image (OVA file) and import it to VMware Player
Note
If you get a warning that the import failed, just click “Retry” and it will run.
You may also check “Do not show this message again”
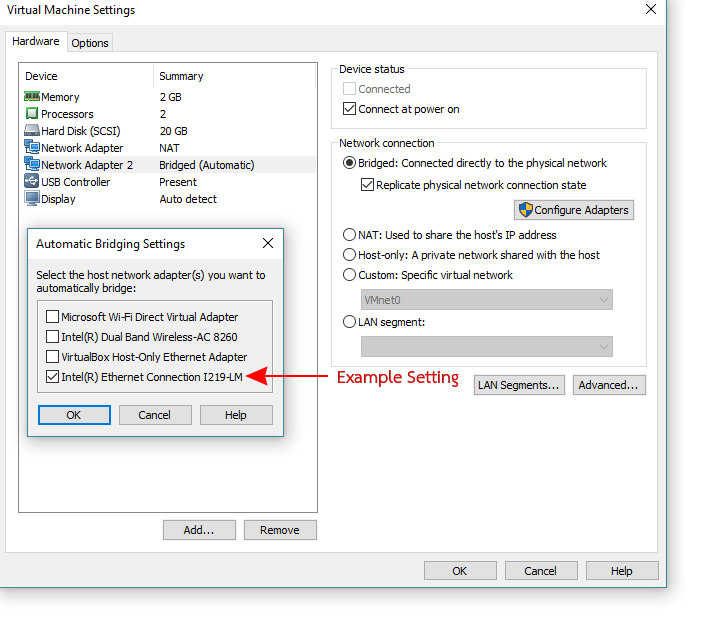
Go to Virtual Machine Settings and check if two network adapters are available - one set to NAT and one set to Bridged (Automatic)
Ensure that the “Replicate physical network connection state” option is checked
Press OK to save changes
Power up and connect the slaves.
Power on the virtual machine
Install and open VMware Fusion
Note
ANY version of VMWare Fusion starting from 10.0 can be used for OBLAC Drives.
Open the OBLAC Drives image (OVA file) in VMware Fusion
Note
If you get a warning that the import failed, just click “Retry” and it will run.
You may also check “Do not show this message again”
Edit the Virtual Machine Settings and set the following (if not already set)
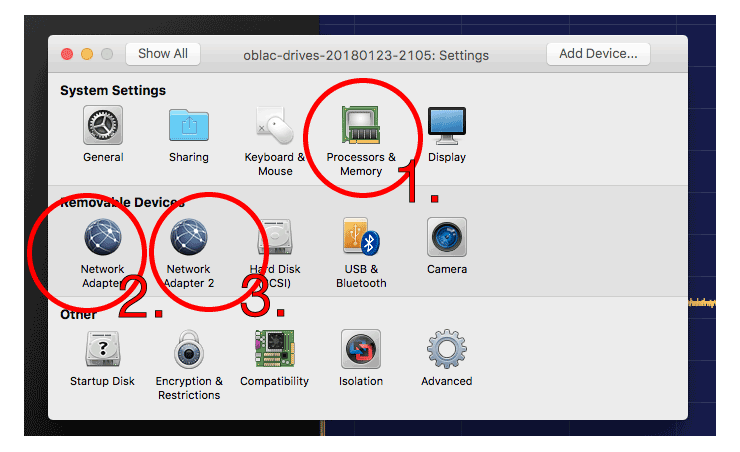
Set the number of processor cores to 2
Check the “Enable hypervisor application” option

The network adapters should be set to: Private to my Mac

Power up and connect the slaves.
Play the virtual machine.
Install and open VMware Workstation Player
Note
ANY version of VMWare Workstation Player starting from 14.0 can be used for OBLAC Drives.
Open a virtual machine
Select the downloaded OBLAC Drives image (OVA file) and import it to VMware Player
Note
If you get a warning that the import failed, just click “Retry” and it will run.
You may also check “Do not show this message again”
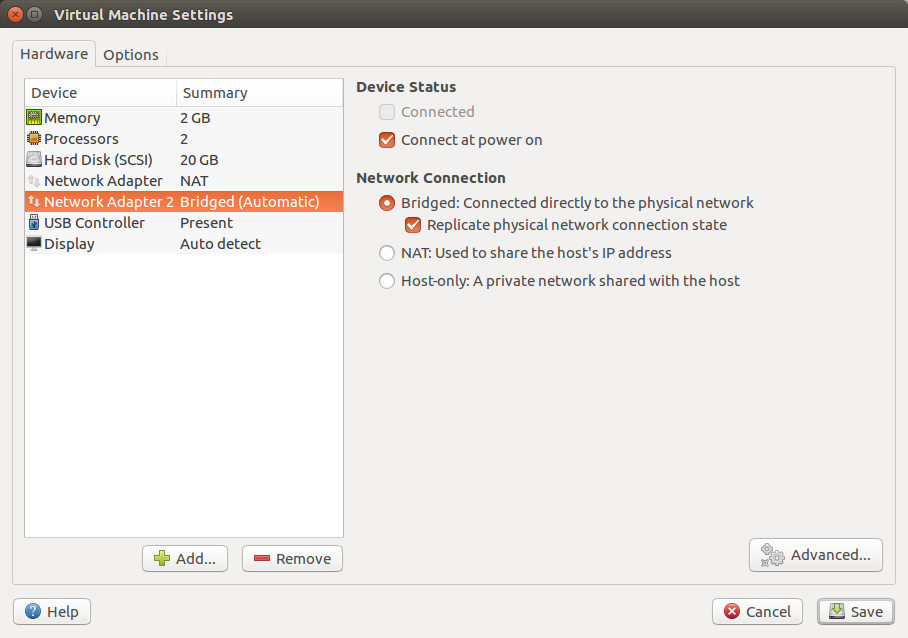
Go to Virtual Machine Settings and check if two network adapters are available - one set to NAT and one set to Bridged (Automatic)
Ensure that the “Replicate physical network connection state” option is checked
Press OK to save changes
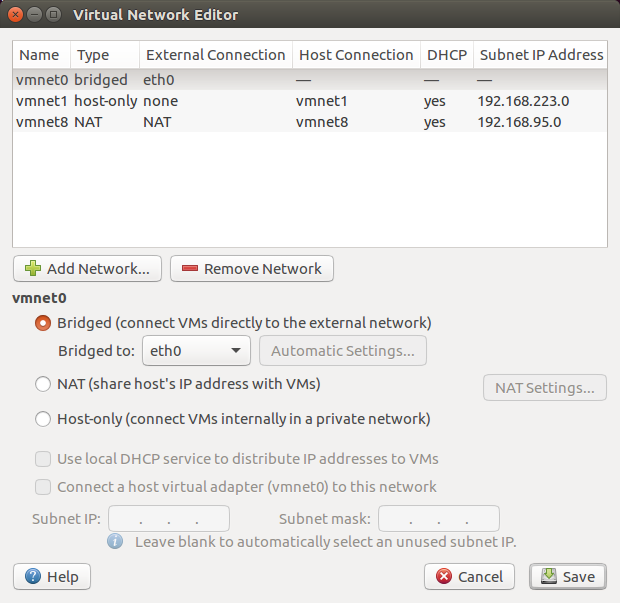
Network settings
Execute
sudo /usr/lib/vmware/bin/vmware-netcfg
Select the bridged network adapter and bridge it to the system network adapter to which the slaves are connected to
The network adapter has to be an Ethernet connection, so it likely starts with “eth”
Save changes
Power up and connect the slaves.
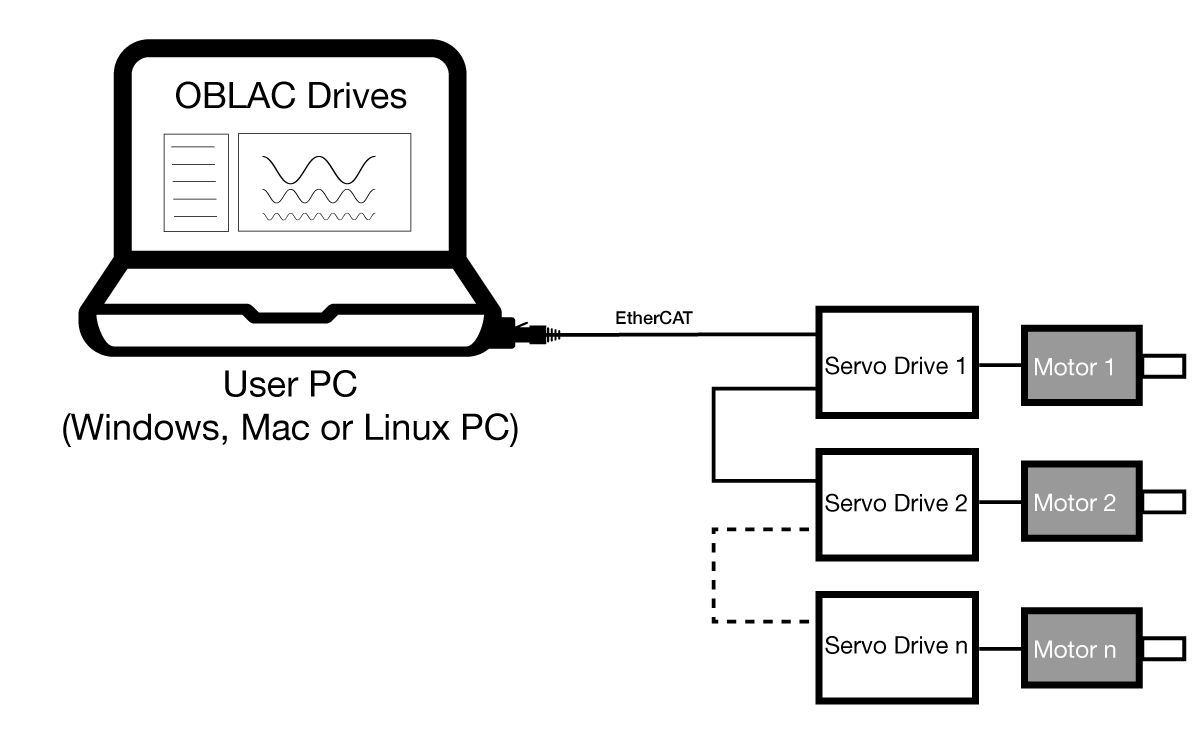
To connect your host PC with the servo drive, simply plug the EtherCAT cable on your Ethernet port (RJ45) of your PC and connect it to the servo drive on EtherCAT port IN.
Details about this connector for SOMANET Node and SOMANET Circulo.
Play the virtual machine
In case your systems hints that a swap partition is needed:
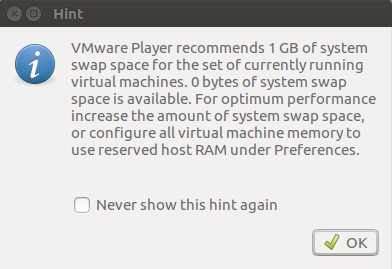
Close the VMware Player
sudo gedit /etc/vmware/config
prefvmx.minVmMemPct = "100"
at the end of the file and save
Restart the VMware Player
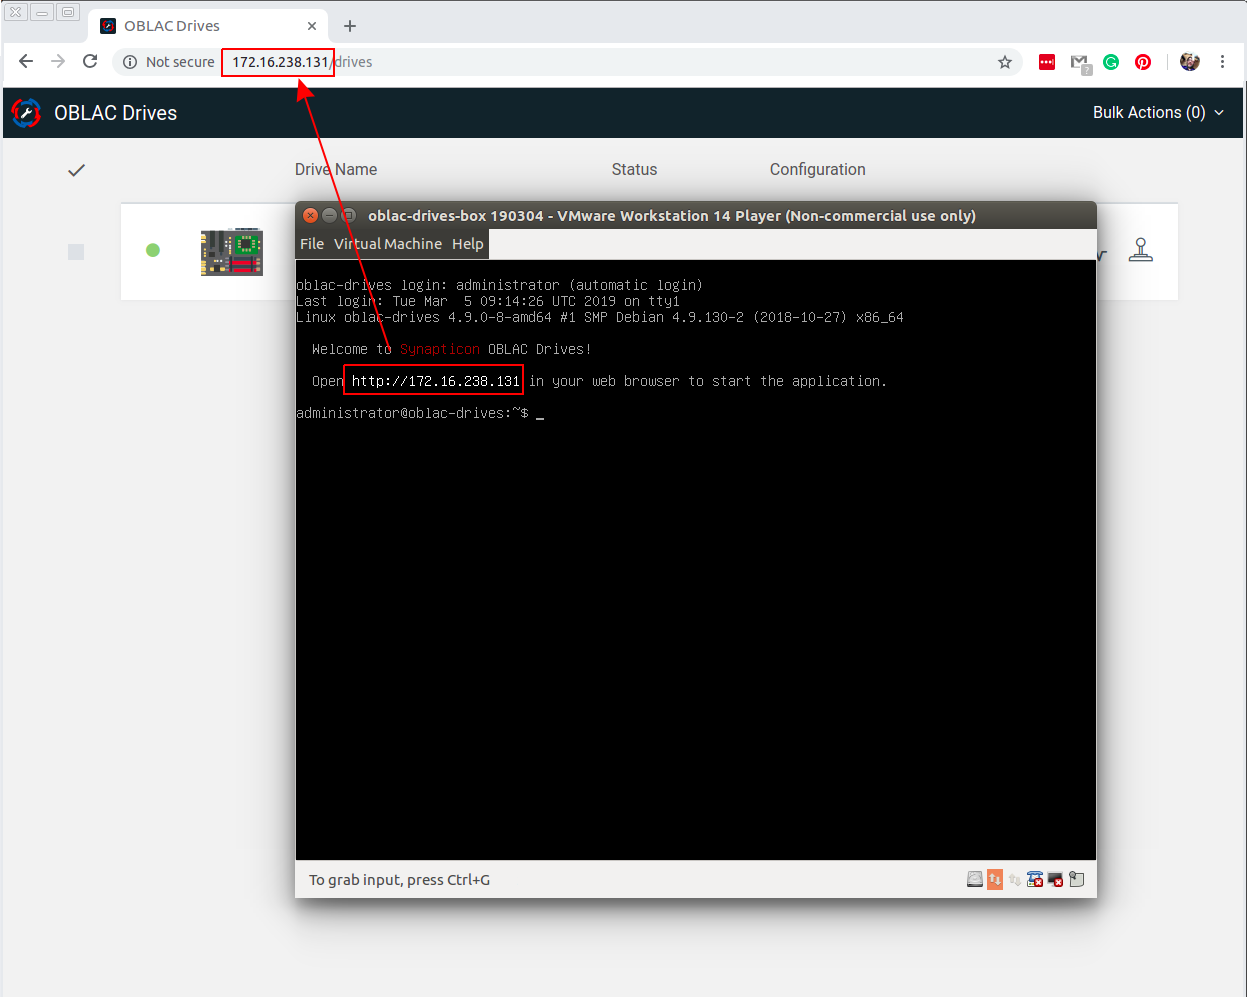
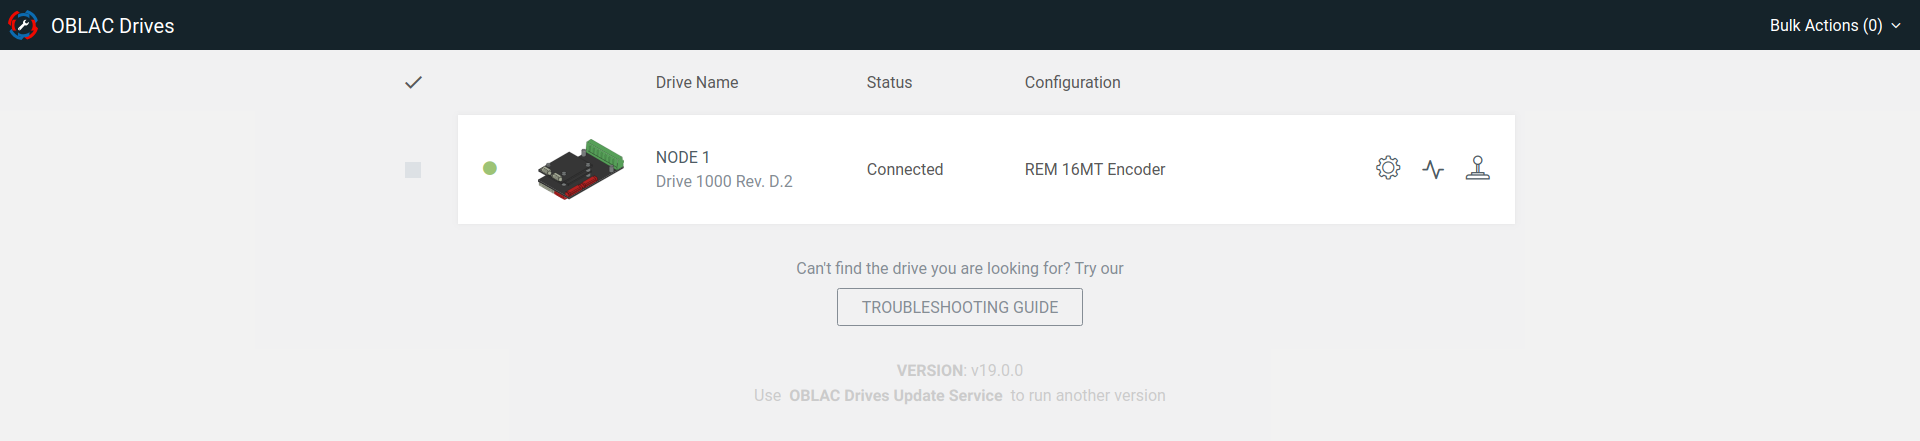
Once your virtual machine is powered up, you will find the IP address of OBLAC Drives at the top of the screen. Enter this IP address in your browser and wait for OBLAC Drives to show the connected drives.
Connect your PC via EtherCAT cable to the servo drive. For tuning, you may connect several servo drives via EtherCAT and tune one by one.
Please check in you browser that the Drive is connected:
Before using OBLAC Drives, you need to install the latest version of OBLAC Drives with our OBLAC Drives Update Service.
It is possible to use OBLAC Drives Box offline and to install and run the previous versions of OBLAC Drives. Newer versions of OBLAC Drives that get installed will be cached on the box, but they will have to be downloaded from the Internet.
That’s it! You may now proceed to commission your SOMANET servo drive:
How to set the parameters for your motor and sensors correctly.
Always give OBLAC Drives up to a minute to detect the available drives after they have been powered on or connected
If the drives aren’t found, or anything else seems to be wrong, please try refreshing the web page first and then power cycling the drive(s)
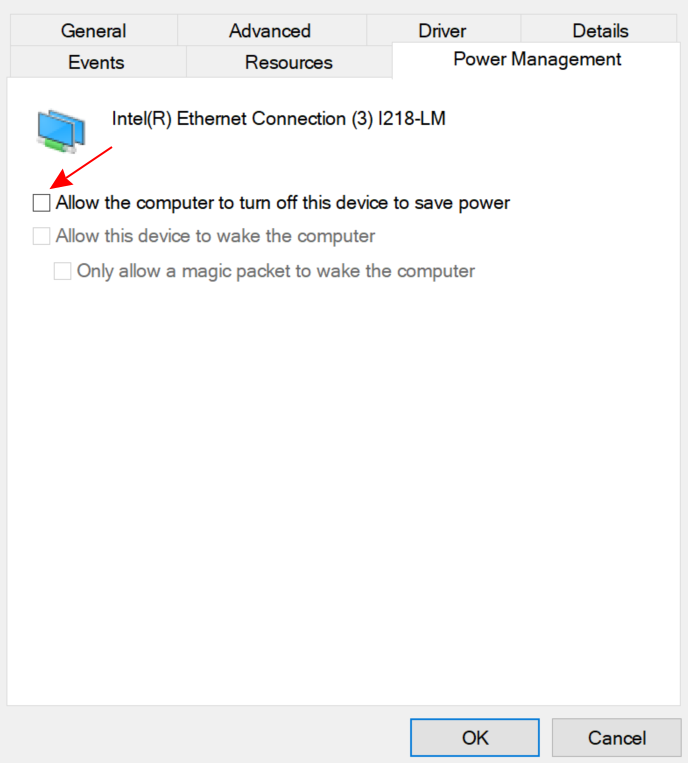
If you are running Windows, please ensure that the power-saving functionality for LAN is turned OFF
In some cases after the start-up of OBLAC Drives the URL isn’t shown and the website can’t get accessed. In that case, please try switching the order of the network adapters in the VMware setting for that virtual machine:
Bridged (Automatic)
NAT
There are more issues listed in our Troubleshooting Guide.