- Hardware Manuals
- Commissioning and Tuning Guide
- Software Reference
- Resources
Cogging is an effect caused by magnetic interaction between the motor rotor and the stator. It results in torque ripples over the motor revolution, which leads to uneven motion or generally unsatisfying performance of the motor at low velocities. This phenomenon is of particular concern in low-cost motor models but can be compensated on a software level.
Cogging torque compensation is a software feature that suppresses torque ripple of electric motors to overcome vibration problems in high precision and low velocity applications. It can be found in OBLAC Drives
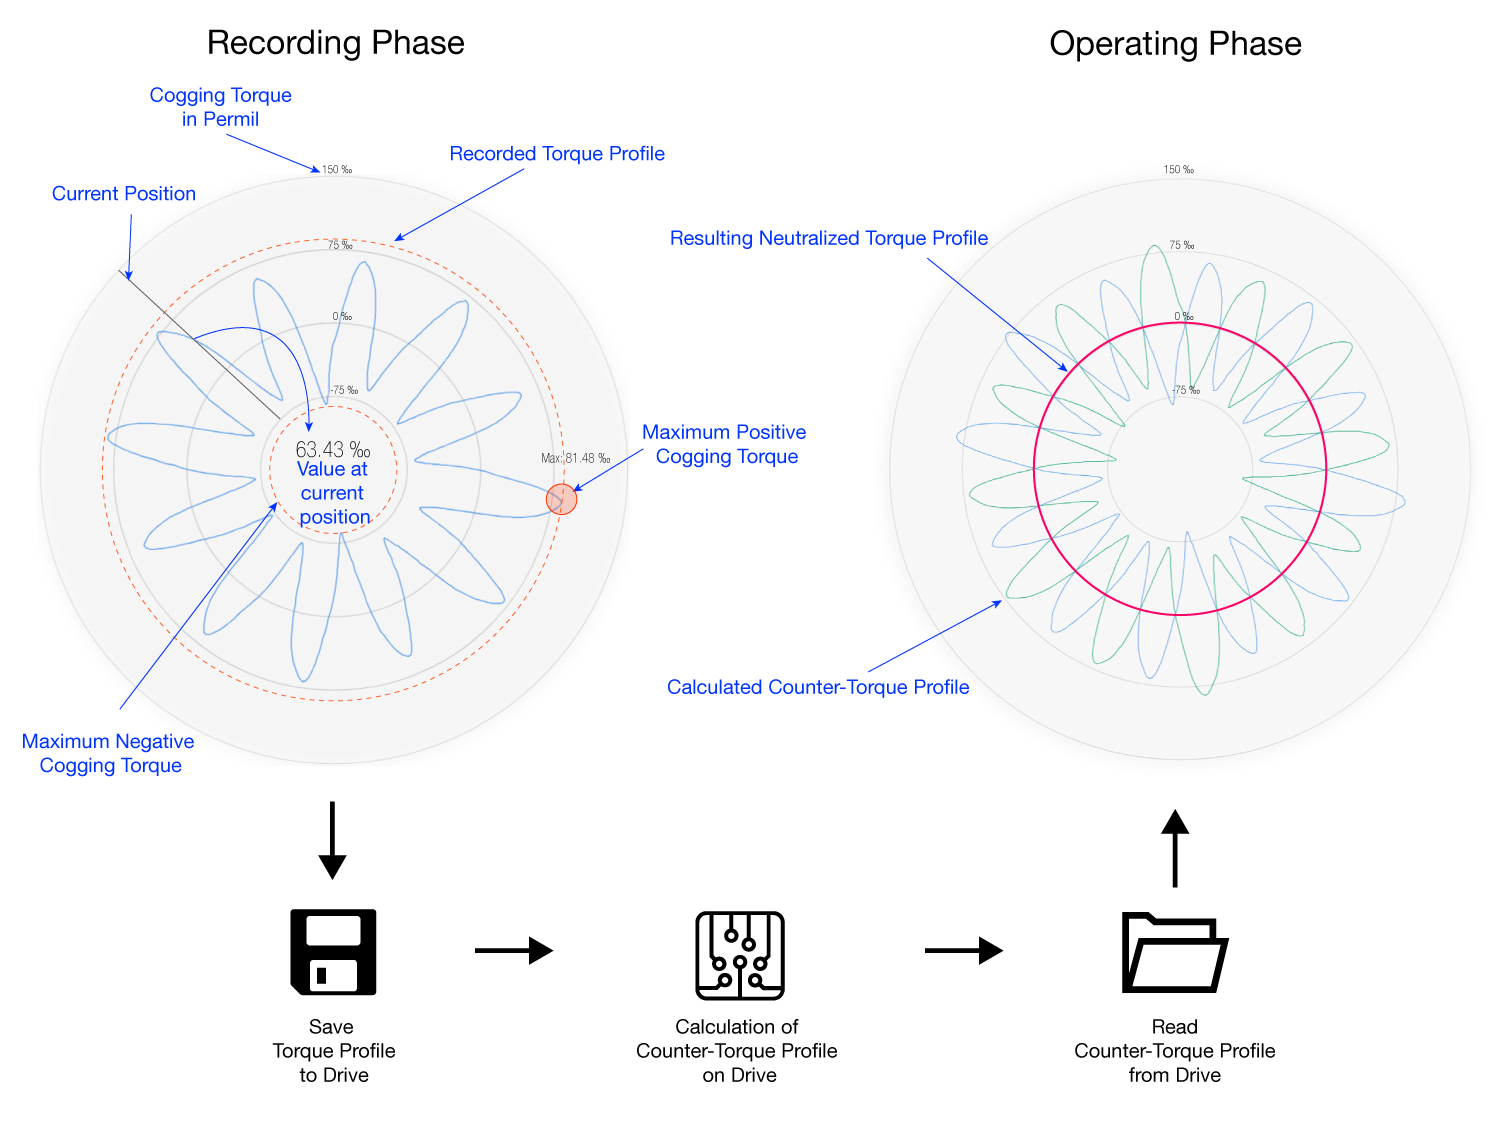
When cogging torque compensation is activated, an additional torque component is generated actively by the motor in order to compensate for the cogging torque. The compensation feature makes use of the fact that cogging torque is dependent on the single-turn motor position. To find the amount of compensation torque needed at each motor position, a recording procedure has to be performed before the compensation itself can be used.
Note
During the recording phase, the motor will do several turns at low velocities. Since cogging is a property of the motor and independent of attached loads it’s possible to perform the procedure outside the actual setup.
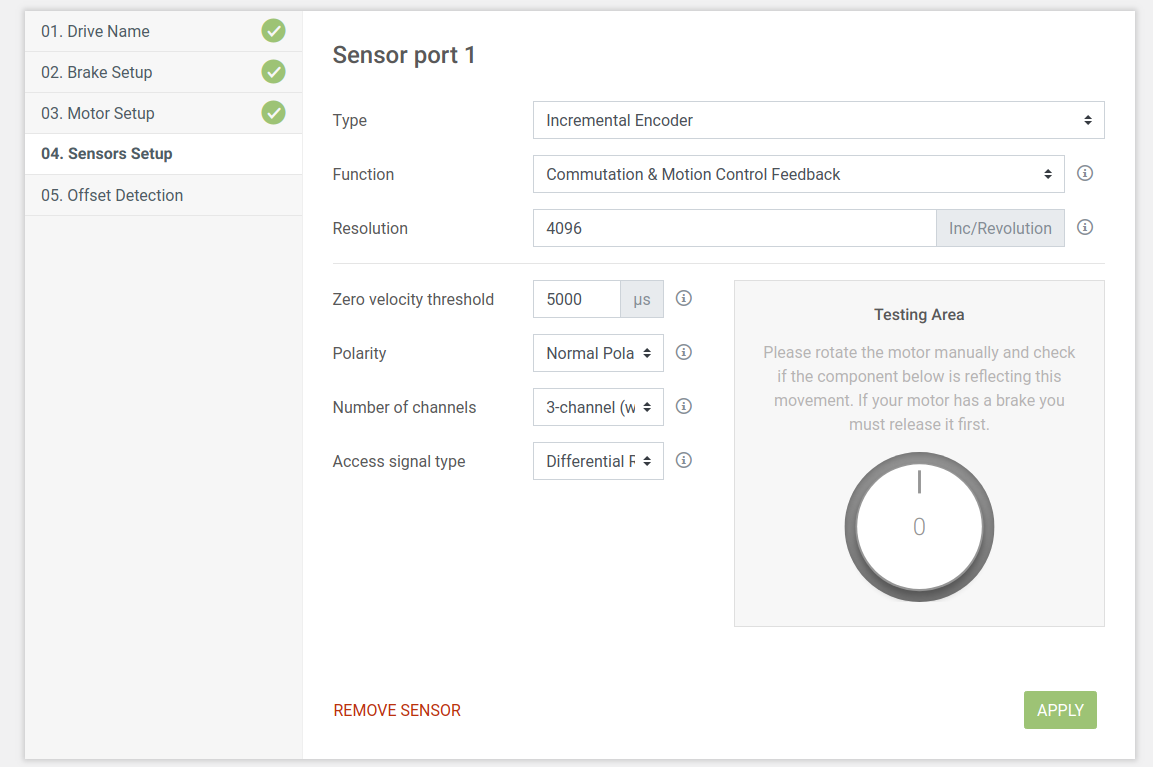
The minimum encoder resolution has to be at least 1024 increments. It is recommended to use a resolution of 4096 increments or higher. Motor-integrated commutation Hall sensors can’t be used for Cogging Torque Compensation due to limited accuracy.
The motor and the drive should be properly sized. In particular, the motor’s rated current should be at least 20 % - 30 % of the drive’s rated current.
For executing the cogging torque recording the motor must not be mechanically blocked and ideally must have no load attached.
The motor is fully functional and the drive is properly configured.
The System identification and position auto-tuning procedures were successfully executed with the current setup. The position control mode is fully functional.
Before recording the cogging torque compensation table, a special configuration of the drive is required. This is done automatically, but can also be executed manually. When the recording is finished, this configuration is discarded and the old values are restored.
This is the recommended default option that will do the procedure automatically. It uses a mathematical model of the electromechanical system obtained during the system identification to tune the controller. This procedure might take up to 3 minutes.
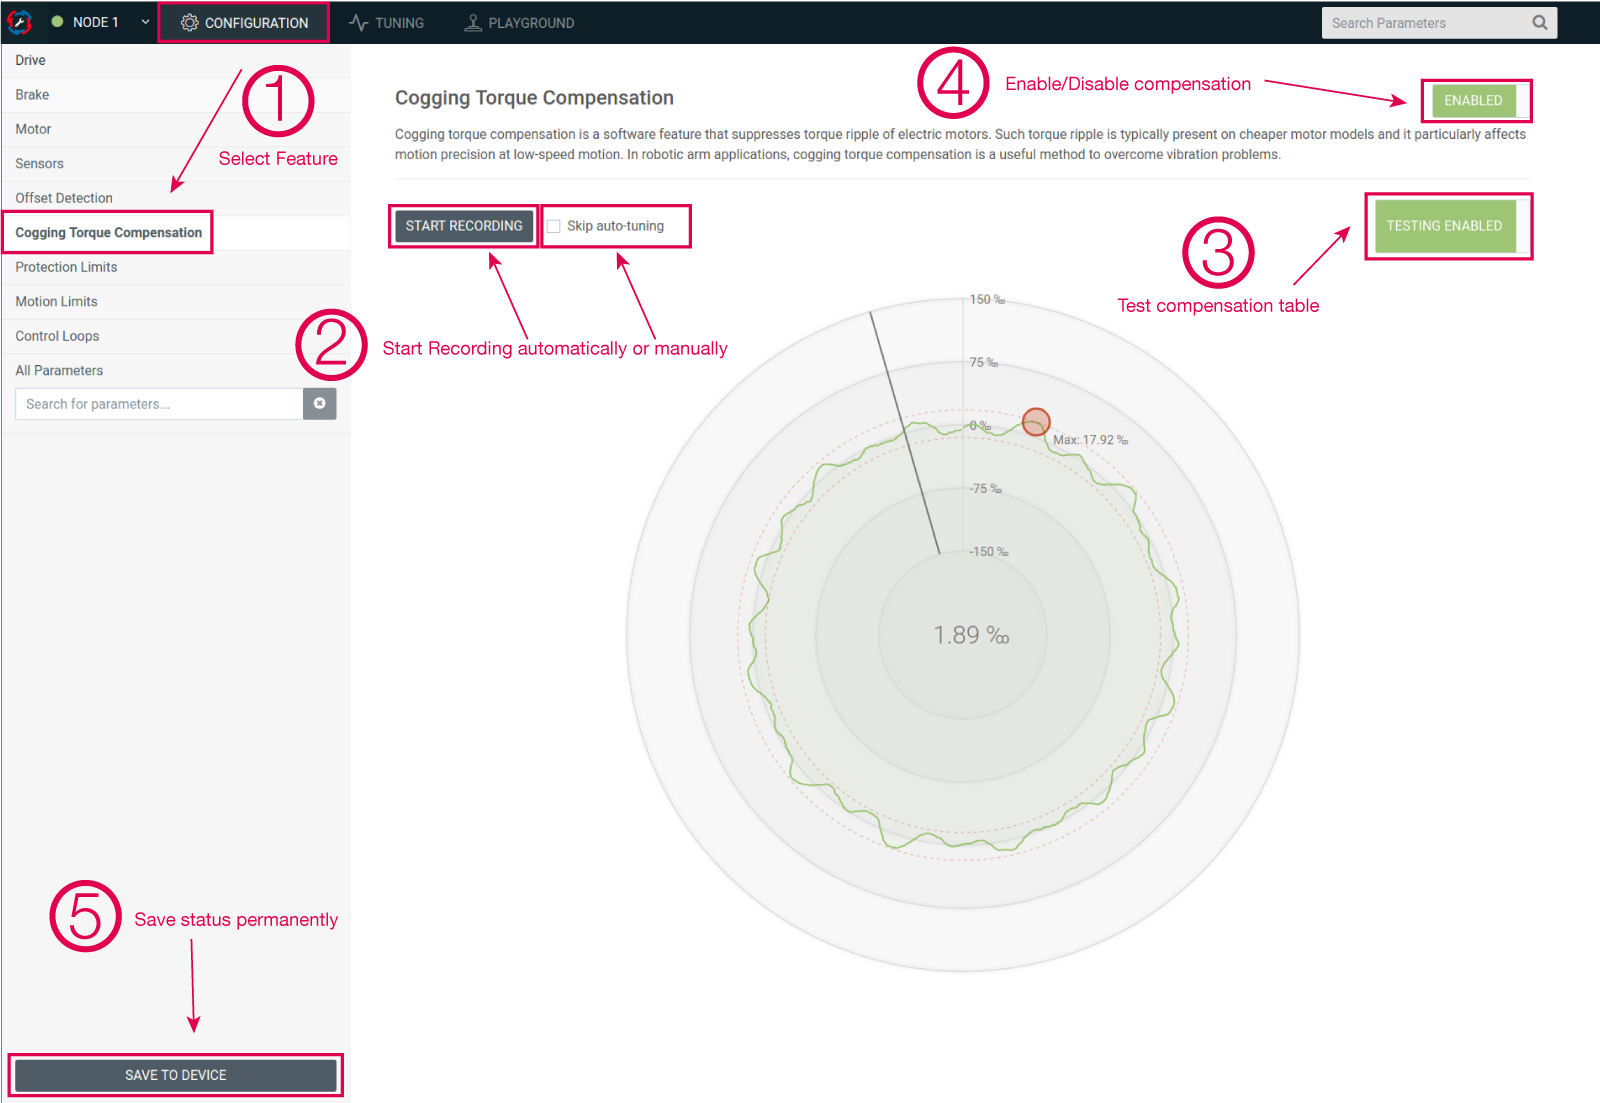
After setting up the drive and successfully executing the system identification, enter the menu item “Configuration” and select “Cogging Torque Compensation”.
For using the automatic recording, simply click on “Start Recording”
Attention
During the recording routine the motor will do several turns.
Once the recording is finished, the values are stored on the Drive. In the OBLAC Drives GUI the feature is disabled and can now be tested manually:
Slide the switch to TESTING ENABLED
Turn the shaft manually, you will feel the torque ripples.
Set the cogging torque compensation feature to ENABLED
Turn the shaft again manually and feel the difference
This option should be used when the performance of the auto-tuning is not satisfactory. In this case, the user should manually configure and tune the system. When the cogging torque compensation recording is triggered, the system will just use the current configuration.
Manually preparing the system for the cogging torque compensation recording:
An encoder on the motor shaft has to be used for the cogging torque compensation table recording. Set the function of this encoder to “Commutation and motion control”. This is done in the setup wizard.
Go to the tuning section and perform :ref:` “System identification” <system-id>`.
Select “Position control mode” and tune the cascaded control loop with the sliders.
The tuning should be as sharp as possible: try setting the settling time slider to 50-80 ms.
Verify the tuning by setting the position ramp profile to 10 RPM velocity. The actual velocity should be as close to 10 RPM as possible.
Go to the cogging torque compensation screen and check the ‘Skip auto-tuning’ checkbox.
After the recording is finished, test the obtained compensation table:
Use switch ‘TESTING DISABLED’ in the cogging torque compensation screen to enable the torque control. Switch ‘DISABLED/ENABLED’ to enable/disable the cogging torque compensation table and feel the difference by rotating the motor shaft by hand.
Restore original configuration of the drive and re-tune control loops if possible.
Once the recording procedure is successfully finished, the cogging torque compensation can be activated and deactivated both in the OBLAC Drives GUI as well as via EtherCAT. The Object 0x2008 ”Cogging torque compensation is set when the cogging torque compensation is enabled or disabled in the GUI of OBLAC Drives.
Set the switch for the cogging torque compensation to “Enabled” and click “Save to Device” to use the feature during operation of the drive.
The feature is activated globally and will be used in all modes of operation (torque control, velocity control and position control).
To enabled or disabled the compensation algorithm Object 0x2008 ”Cogging torque compensation”, subindex 2 (cogging torque compensation enabled) must be set to 1.
By enabling the cogging torque compensation algorithm, the table communicated to the torque controller is added as a set of values to the torque reference value depending on the motor position. If the algorithm is disabled, this is skipped.
To start the cogging torque compensation recording procedure via EtherCAT the manufacturer specific operational mode “COGGING COMPENSATION RECORDING” must be enabled in Object 0x6060 (Op Mode) by setting the value to -1.
State of the cogging torque compensation table. Possible values:
0 - NO DATA (there is no cogging table in the memory
1 - IN PROGRESS
2 - SAVING (recording is done and table is being saved to the memory)
3 - DATA EXISTS (cogging table exists and is saved in the memory)
Enables or disables the cogging torque compensation feature. Set to 0 to disable or to 1 to enable the feature.
The status of the Cogging torque compensation record (0x2008:1) must be set to 1 (IN PROGRESS).
During the start-up of the device it is checked if the cogging table exists in the flash memory and if it exists, the table is communicated to a torque controller. The state is generated accordingly:
0 (no table exists)
5 (table exists)
0x2008 Cogging Torque Compensation
Parameters needed for Cogging Torque Compensation.
